
 ZORANM/E+/GETTY IMAGES PLUS
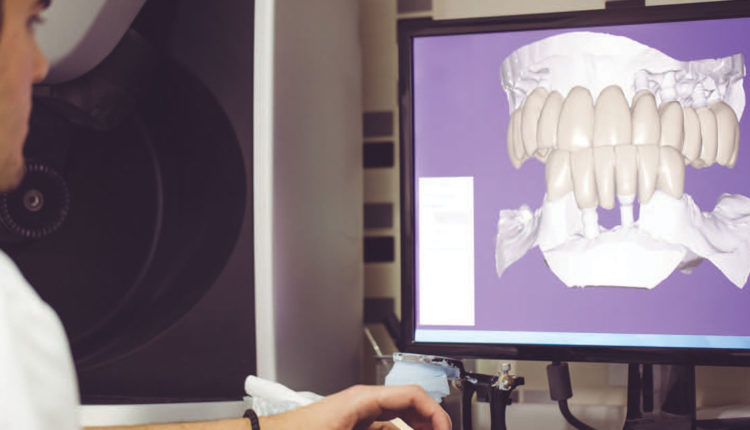
Avoiding Complications During the Restorative Phase of Implant Dentistry
As part of the dental implant process, these restorative strategies will help eliminate complications and peri-implant disease.
PURCHASE COURSE
This course was published in the December 2019 issue and expires December 2022. The author has no commercial conflicts of interest to disclose. This 2 credit hour self-study activity is electronically mediated.
This course was published in the December 2019 issue and expires December 2022. The author has no commercial conflicts of interest to disclose. This 2 credit hour self-study activity is electronically mediated.
EDUCATIONAL OBJECTIVES
After reading this course, the participant should be able to:
- Identify key steps in the dental implant process in regard to risk management, planning, placement and restoration.
- List clinical considerations to prevent or manage complications in implant dentistry.
- Describe modern choices in dental implant systems and the differences between screw-retained and cement-retained restorations.
Dental implant treatment is considered the standard of care for patients who need teeth replaced. Emerging technologies in the dental implant process have improved the biomechanical properties of implants and restorative materials. These developments enhance the quality of implant dentistry and shorten treatment time. Despite these advances, however, complications and implant failure are still possible.
Implant complications stem from biological, mechanical or combined origin, and can occur before, during or after restorative treatment is complete. The purpose of this article is to review some of the complications related to implant restorations and outline strategies to prevent such sequelae.
Adequate planning is essential for the long-term success of implant therapy. As a key element of the diagnostic phase, the patient’s esthetic, phonetic and functional aspects should be evaluated. This, of course, is in addition to assessing the patient’s oral and systemic health. Clinical photographs, mounted study models, two-dimensional (2D) and three-dimensional (3D) imaging, dental and periodontal charts, as well as temporomandibular joint and occlusal analyses should be available for a thorough evaluation of the recipient sites.
Complete evaluation involves a diagnostic wax-up that can be done via analogical means in the lab or digital means utilizing 3D computer aided design/computer aided manufacturing (CAD/CAM) software. This wax-up allows for adequate assessment of esthetic and functional challenges, such as opposing teeth malposition, parafunction, proximal contact issues, and the need for additional opposing or proximal restorations. Peri-implant soft and hard tissues should be evaluated in combination with the diagnostic wax-up and radiographic imaging. Implant placement planning will be reverse-engineered, starting from the wax-up.
SURGICAL IMPLANT PLANNING
Surgical implant placement should not be solely based on 2D imaging (e.g., periapical and panoramic radiographs). Panoramic radiographs present distortion and lack the third dimension, which is crucial information in implant dentistry. Instead, cone beam computed tomography (CBCT) is the gold standard for treatment planning. Advanced 3D imaging provides precise anatomical information of the alveolar bone shape and density, as well as adjacent anatomical structures. It is also helpful when selecting an implant of appropriate length and width.1
Data from the CBCT and surface scans (intraoral or model scans) can be merged in dental imaging software to assess the height and width of the alveolar ridge in relation to the diagnostic wax-up. This dataset can be utilized to design and fabricate a 3D-printed surgical guide that will facilitate ideal implant positioning. Guides help prevent surgical complications, such as damage to anatomical structures or implant placement in an inappropriate restorative position.2,3
The future implant site should have ideal ridge height, width and shape prior to surgery. The selected implant should allow for adequate bone support. Bone volume buccal to the implant is critical, as this area commonly lacks sufficient bone density and buccal plate thickness. Ideally, this buccal bone should have a minimum thickness of 2 mm to minimize the risk for long-term resorption.4 In addition, the peri-implant keratinized and soft tissue biotype should be evaluated to improve the prognosis of the restoration and prevent recession and difficulty with oral hygiene.5
Grafting procedures should be considered prior to implant surgery if the site lacks proper hard and soft tissue. Once the site is suitable for surgery, an implant of appropriate height and width should be selected, along with the implant body and connection type.
The implant connection has an engaging element that allows for implant insertion and serves as an attachment assembly for the abutment. Most current implant systems utilize internal connections due to increased stability and fewer issues with screw loosening compared to an external connection. Some implant systems add a conical or Morse tapered surface to the implant connection to increase stability.6
In addition, most designs incorporate a platform shift — also known as platform switching — which is a horizontal mismatch of the implant and abutment surfaces that provides increased bone-level preservation.7–9
Clinicians should bear in mind the biomechanical differences between natural teeth and implants. These differences include the lack of a periodontal ligament (PDL) or firmly attached periodontal fibers, and lack of resilience to compressive occlusal forces. Overlooking these elements could lead to mechanical, biological and esthetic complications.
BIOLOGICAL COMPLICATIONS
As part of treatment planning in implant dentistry, biological principles should be considered prior to implant placement. The hard and soft tissue components should be addressed at this stage. Suitable implant placement allows for adequate interproximal and interocclusal leeway, leading to ideal restoration size and shape. Additionally, restorative space should be evaluated prior to implant placement.
Implants should be placed at sufficient depth (typically 3 to 4 mm from the gingival margin to the implant platform)10 to provide an excellent restoration contour and cleansability. When a bone-level implant platform is shallow (2 mm or less), the emergence profile might be flat and at a closed angle in relation to the implant (Figures 1A and 1B), leading to food entrapment and a hard-to-clean restoration.

The most common biological complication around implants is peri-implant mucositis, followed by peri-implantitis. It is estimated that up to 50% of implants will be affected by peri-implant mucositis, and 12% to 43% will be affected by peri-implantitis.11
According to Heitz-Mayfield and Salvi,12 peri-implant mucositis is defined as a “disease in which the presence of inflammation is confined to the mucosa surrounding a dental implant, with no signs of loss of supporting bone.” By extension, Schwarz et al13 define peri-implantitis as an “inflammatory process around an implant which includes both soft tissue inflammation and loss of supporting bone.”
A poorly designed implant restoration or a lack of keratinized tissue (KT) could initiate peri-implant mucositis. A band of at least 2 mm of KT buccal and lingual to the implant should be present.5 When nonkeratinized mucosa is present around the implant, brushing and flossing could become painful and hinder oral hygiene — increasing plaque and calculus around the implant. If adequate KT is lacking after the implant has been restored, soft tissue grafting should be considered to improve the long-term stability of the peri-implant soft tissue and promote effective self-care.
Peri-implant mucositis can develop into peri-implantitis if the causative factor is not corrected. Factors such as peri-implant plaque and calculus, excess cement, and micro-cracks on the implant surface (produced by excessive insertion torque or uncontrolled occlusal forces) increase the risk for peri-implantitis. This risk increases when these factors are present in patients with uncontrolled periodontal disease or uncontrolled systemic conditions (such as diabetes), or other metabolic and immune diseases.14,15
Clinically, it is imperative to control every risk factor to prevent biological complications and improve long-term implant success.
MECHANICAL COMPLICATIONS
The main biomechanical difference between teeth and implants is the lack of a PDL in implants, which reduces the device’s adaptability to occlusal forces. Overlooking this factor during planning can lead to mechanical complications. For example, excessive force during centric or excursive movements increases stress on the restoration, creating mechanical complications, such as porcelain chipping, screw loosening or fracture, and, in extreme cases, implant fracture.
Porcelain chipping is the most common mechanical complication.16 It is chiefly caused by stress concentration during function, although poor framework design may be a contributing factor. Porcelain thickness should not exceed 1.5 to 2.0 mm; if these guidelines are not followed, the porcelain could fracture.
Occlusion should be carefully adjusted to prevent overload on the restoration during function. Overall occlusion should be analyzed to determine if anterior/canine guidance is present or if the patient has group function. Care should be taken to control or eliminate any parafunction.17,18
When restoring anterior implants, anterior guidance is preferred, and clinicians can rely on adjacent natural teeth (if present) to distribute the protrusive and lateral movements.
Posterior implant restorations should have centric contact, and working or balancing interferences should be eliminated. Centric contacts should be adjusted utilizing shimstock foil (8 to 12 µm thick). A strip of shimstock is placed between the occlusal surfaces of the restoration to be evaluated. While the patient occludes, the shimstock should be easily removed when pulled laterally, providing only light friction. If the foil is trapped, the contact spots should be identified and adjusted until the shimstock is easily removed.
If porcelain chipping occurs (even after occlusion has been adjusted), various approaches can be used to address the complication. Screw-retained restorations are retrieved by uncovering the screw access channel and unscrewing them; a temporary crown is placed and the chipped restoration is sent to the laboratory for repair. By comparison, removal of cement-retained restorations is challenging due to the lack of direct access to the screw. Excessive force while trying to separate the crown/cement/abutment interface can potentially result in implant damage. In the past, it was common to use temporary cement (sometimes mixed with petrolatum) to deliver implant restorations. This is no longer common practice due to the high risk of retention loss. If a cement-retained restoration cannot be easily removed, it is advisable to section it and create a new restoration to avoid damaging the implant.
While the use of monolithic restorations eliminates the potential for porcelain chipping, this might present an esthetic limitation for anterior implants. Although monolithic ceramic systems are incorporating translucency into their materials, esthetically demanding cases could benefit from porcelain layering on nonfunctional areas and occlusal contacts on the monolithic ceramic surface. This layer improves the esthetics of the restoration due to the ability to mimic the translucency, opacity, opalescence and fluorescence found in natural teeth.
Screw loosening19 or screw fracture is a complication partially produced by excessive functional stress. When excessive non-axial occlusal forces are transferred to the abutment/implant connection, the screw will undergo stress. Depending on the frequency, magnitude and direction of the forces, the screw can lose torque, which will allow the abutment/crown to become mobile. Such mobility will cause friction, damaging the internal connection of the implant. This should be addressed promptly to avoid further damage.
Clinically, screw loosening on screw-retained restorations is solved by removing the restoration and replacing the screw. If no damage is observed between the implant connection and abutment, the new screw should be adequately torqued and occlusion adjusted as previously described.
This complication becomes a challenge on cemented restorations because screw access is not immediately available. Screw access can be created by drilling an orifice through the crown. Previous patient models, radiographs and CBCT images may help determine the best spot to create the orifice. This approach is a “one-time shot,” meaning that if the screw channel is not located, clinicians are advised to section the crown and fabricate a new one.
Prolonged abutment mobility due to screw loosening or excessive forces might result in screw fracture. In such cases, the implant/abutment connection should be carefully evaluated. When the restoration can be utilized and no damage is observed, a new screw can be placed, properly torqued, and the occlusion adjusted. Screw torque beyond the manufacturer’s recommendation can also lead to screw fracture. In this situation, a new screw should be used following the manufacturer’s instructions. A torque-control device is advised to ensure appropriate force is delivered to the screw.
It is important to use only new screws supplied by the implant manufacturer. The use of laboratory screws on final restorations should be avoided because these are fabricated utilizing various alloys (generally stainless steel), as compared with final screws (which are generally gold or titanium alloys). Using inadequate screws can lead to screw loosening, screw fracture, corrosion, and structural damage on the implant’s internal threads.
Fracture of the implant is an uncommon complication that appears as a partial (crack) or complete fracture around the implant connection, at the level of the screw threads or internal retentive feature walls. Multiple factors lead to this irreversible complication. Excess insertion torque during implant placement can create a fracture through the implant connection walls that goes unnoticed until the implant is restored and occlusal forces are applied. Such fracture can also lead to peri-implantitis. To avoid excess insertion torque, appropriate drilling instruments and protocols — specific for each implant type and size — should be utilized.
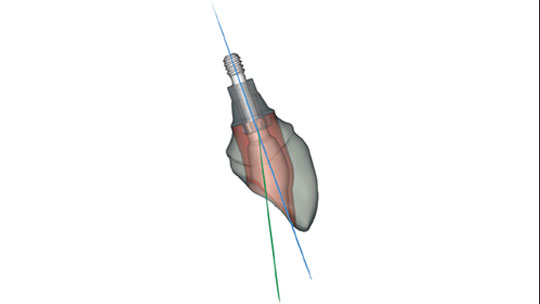
The selection of adequate implant type and size, proper peri-implant bone, and the occlusal scheme should be considered to prevent implant fractures. This is crucial because implant fracture is a catastrophic complication; the affected implant cannot be further utilized and must be removed, “slept” or replaced (Figures 2A and 2B).

service (A). Digital planning for implant placement on sites #29 and 31 to avoid site #30 (B).
SCREW- VERSUS CEMENT-RETAINED IMPLANT CROWNS
Cement-retained restorations utilize a stock or custom abutment that is connected to the implant with a screw, and a full-coverage crown is cemented on the abutment. By comparison, screw-retained restorations integrate the abutment and crown in a single piece. A core that includes the connection to the implant (e.g., hex, trilobe or square) is either fused (using noble metal alloys) or milled (from a block of a metal alloy or high-strength ceramic). This core is a substructure that will include layered porcelain to provide the final crown shape. When using high-strength ceramics (such as zirconia), the restoration can be milled to the final contour of the crown; this is known as a monolithic restoration, and there is no need for porcelain stacking.
In order to retain the crown on the implant, the screw goes into a channel through the restoration; this leaves the channel access on the contour of the crown. Ideal implant placement is crucial to allow the screw access to be located on the cingulum of anterior crowns, and the occlusal surface of posterior crowns. If such placement is not possible, angled screw channel systems can be utilized to correct the screw access orifice and place it on the aforementioned surfaces. These angle correction systems are fabricated using CAD/CAM technology and allow up to 25 degrees of angle modification (Figure 3).
The advantages of screw-retained versus cement-retained restorations are ease of restoration retrieval and the lack of a luting agent. If cement flowing around the abutment during crown placement is not properly removed, it can penetrate into the peri-implant soft tissue and cause peri-implantitis. In an endoscopic study, Wilson20 noted that “excess dental cement was associated with signs of peri-implant disease in the majority (81%) of cases.”
If a cement-retained restoration is the only option, care must be exercised during the luting process.21 Several techniques have been described to avoid excess cement, such as pre-extrusion of cement excess, and the use of packing cord or a rubber dam22,23 around the abutment. It is imperative to apply the least amount of cement necessary. The internal surface of the crown can be replicated in vinyl polysiloxane material or stone to help remove excess cement.24,25 In this technique, a layer of cement is painted on the internal surface of the crown and the restoration is seated on the abutment replica to extrude excess cement, after which the crown is cemented to the final abutment.
CONCLUSION
The risk for complications when restoring implants is always present. As such, careful treatment planning is a prerequisite to successful long-term outcomes. In addition, all preventive measures should be exercised throughout every step of the dental implant process to avoid and/or promptly correct any sequelae related to implant treatment.
Acknowledgement: The author thanks Regina Casian, DDS, and Mitchell Ponsford, DMD, MS, for their editorial contributions to this article.
REFERENCES
- Benavides E, Rios HF, Ganz SD, et al. Use of cone beam computed tomography in implant dentistry: the International Congress of Oral Implantologists consensus report. Implant Dent. 2012;21:78–86.
- Higginbottom FL, Wilson TG Jr. Three-dimensional templates for placement of root-form dental implants: a technical note. Int J Oral Maxillofac Implants. 1996;11:787–793.
- Worthington P, Rubenstein J, Hatcher DC. The role of cone-beam computed tomography in the planning and placement of implants. J Am Dent Assoc. 2010;141(Suppl 3):19s–24s.
- Grunder U, Gracis S, Capelli M. Influence of the 3-D bone-to-implant relationship on esthetics. Int J Periodontics Restorative Dent. 2005;25:113–119.
- Monje A, Blasi G. Significance of keratinized mucosa/gingiva on peri-implant and adjacent periodontal conditions in erratic maintenance compliers. J Periodontol. 2019;90:445–453.
- Lemos CA, Verri FR, Bonfante EA, Santiago Júnior JF, Pellizzer EP. Comparison of external and internal implant-abutment connections for implant supported prostheses. A systematic review and meta-analysis. J Dent. 2018;70:14–22.
- Lazzara RJ, Porter SS. Platform switching: a new concept in implant dentistry for controlling postrestorative crestal bone levels. Int J Periodontics Restorative Dent. 2006;26:9–17.
- Vigolo P, Givani A. Platform-switched restorations on wide-diameter implants: a 5-year clinical prospective study. Int J Oral Maxillofac Implants. 2009;24:103–109.
- Al-Nsour MM, Chan HL, Wang HL. Effect of the platform-switching technique on preservation of peri-implant marginal bone: a systematic review. Int J Oral Maxillofac Implants. 2012;27:138–145.
- Kan JY, Rungcharassaeng K, Umezu K, Kois JC. Dimensions of peri-implant mucosa: an evaluation of maxillary anterior single implants in humans. J Periodontol. 2003;74:557–562.
- Figuero E, Graziani F, Sanz I, Herrera D, Sanz M. Management of peri-implant mucositis and peri-implantitis. Periodontol 2000. 2014;66:255–273.
- Heitz-Mayfield LJ, Salvi GE. Peri-implant mucositis. J Periodontol. 2018;89(Suppl 1):S257–S266.
- Schwarz F, Derks J, Monje A, Wang HL. Peri-implantitis. J Clin Periodontol. 2018;45(Suppl 20):S246–S266.
- Monje A, Insua A, Wang HL. Understanding peri-implantitis as a plaque-associated and site-specific entity: On the local predisposing factors. J Clin Med. 2019;8:279.
- Albrektsson T, Canullo L, Cochran D, De Bruyn H. “Peri-Implantitis:” a complication of a foreign body or a man-made “disease.” Facts and fiction. Clin Implant Dent Relat Res. 2016;18:840–849.
- Wittneben JG, Buser D, Salvi GE, et al. Complication and failure rates with implant-supported fixed dental prostheses and single crowns: a 10-year retrospective study. Clin Implant Dent Relat Res. 2014;16:356–364.
- Koyano K, Esaki D. Occlusion on oral implants: current clinical guidelines. J Oral Rehabil. 2015;42:153–161.
- Sheridan RA, Decker AM, Plonka AB, Wang HL. The role of occlusion in implant therapy: a comprehensive updated review. Implant Dent. 2016;25:829–838.
- Kourtis S, Damanaki M, Kaitatzidou S, Kaitatzidou A, Roussou V. Loosening of the fixing screw in single implant crowns: predisposing factors, prevention and treatment options. J Esthet Restor Dent. 2017;29:233–246.
- Wilson TG Jr. The positive relationship between excess cement and peri-implant disease: a prospective clinical endoscopic study. J Periodontol. 2009;80:1388–1392.
- Bidra AS. Prosthodontic safety checklist before delivery of screw-retained and cement-retained implant restorations. J Prosthet Dent. 2018;119:193–194.
- Salem D, Alshihri A, Levin L. Peri-implantitis induced by a retained retraction cord. Quintessence Int. 2014;45:141–143.
- Seo CW, Seo JM. A technique for minimizing subgingival residual cement by using rubber dam for cement-retained implant crowns. J Prosthet Dent. 2017;117:327–328.
- Wadhwani C, Pineyro A. Technique for controlling the cement for an implant crown. J Prosthet Dent. 2009;102:57–58.
- Wadhwani C, Rapoport D, La Rosa S, Hess T, Kretschmar S. Radiographic detection and characteristic patterns of residual excess cement associated with cement-retained implant restorations: a clinical report. J Prosthet Dent. 2012;107:151–157.
From Decisions in Dentistry. November/December 2019;5(10):42—45.

