Rubber Dam Isolation Techniques for Complex Restorations
The use of rubber dams in restorative dentistry may help decrease possible clinician exposure to infectious agents — an important consideration during the COVID-19 pandemic.
Following the American Dental Association (ADA) algorithm for emergency and urgent dental care, the recommendation for rubber dam isolation to decrease possible exposure to infectious agents has gained awareness among dental practitioners.1 Proof of this is found in the increased number of webinars and journal articles related to the basics of rubber dam isolation (see “10 Steps to Rubber Dam Isolation in Restorative Therapy”).2
The challenge is that due to COVID-19 there are a number of complex restorative procedures that require more advanced isolation techniques that have not been widely covered. This article will describe the armamentarium — as well as clamp modification techniques — needed to widen the scope of rubber dam isolation in restorative practice. The authors’ clinical recommendations for the rubber dam clamps that should be available in restorative kits include:
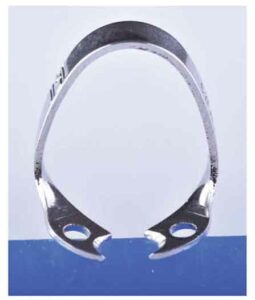
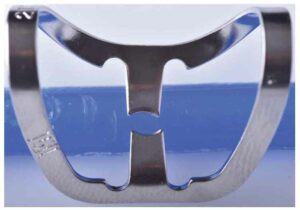
1. Retentive: W00 (Figure 1) and 212 clamps (Figure 2)
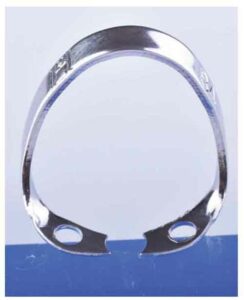
2. Retraction: B4 clamp (Figure 3)
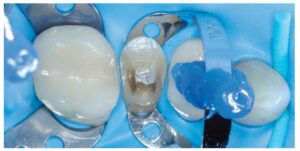
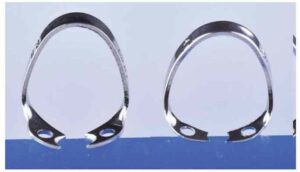
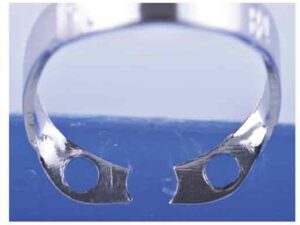
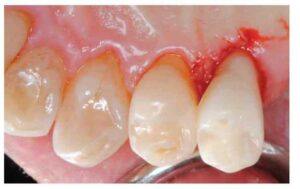
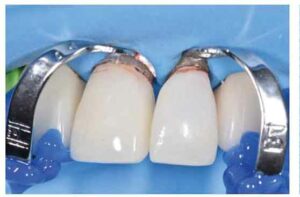
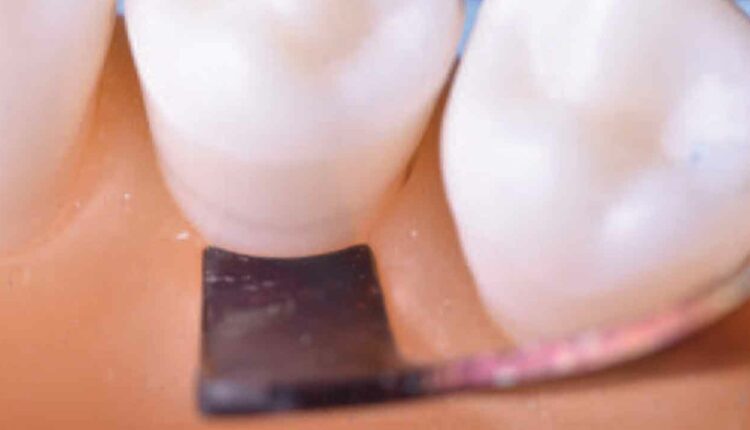
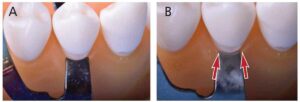
The W00 clamp was designed for use on premolars, but, due to its narrow beaks, sharp points and tall bow, it could be used in canines and incisors as well. It is fairly easy to stabilize with its four sharp points, but stability can be improved with block-out resin if needed (Figure 4). This clamp is useful for isolation during bonding or cementation of indirect restorations. The B4 clamp looks similar to the W00 (Figure 5), but its main difference is beak design. The B4 clamp has narrower beaks and rounded points (Figure 6), which allow the possibility of pushing the clamp cervically to retract the rubber dam and tissue in subgingival lesions, or for teeth that present with tissue recession and cavitated root surface lesions (Figure 7 and Figure 8).
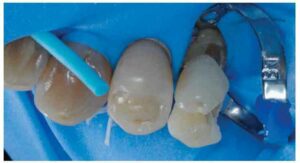
Other indications for the B4 clamp include removal of defective crowns and, in some cases, tooth preparation for indirect restorations (Figure 9). Lack of space for the handpiece and rotary instruments (due to this clamp’s short and narrow bow) handicaps the B4 for a wider variety of indirect restorative procedures, which is why modification of the 212 butterfly clamp was introduced in restorative dentistry more than 25 years ago.3 Because this modified version of the 212 clamp is so versatile, this article covers the modification steps in detail.
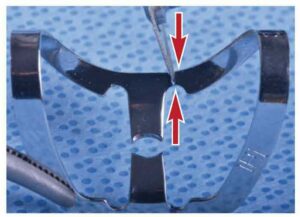
Step 1. Sectioning the clamp. First, mark the areas that need sectioning (Figure 10).
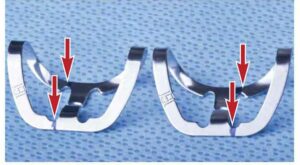
sectioning.
Step 2. Section the clamp using a fine diamond disc (Figure 11).
Step 3. Polish the sectioned areas using an abrasive silicon carbide disc so they are not sharp (Figure 12).
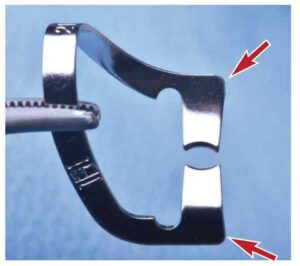
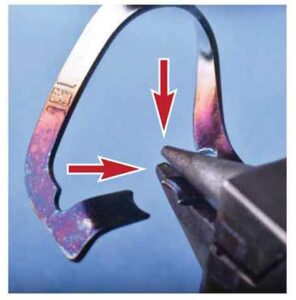
Step 4. Using a gas torch, heat the beaks of the modified clamp (until they appear red hot), followed by immersion in cold water. This step is crucial because it eliminates metal memory and allows repositioning of the buccal and lingual beaks (Figure 13).
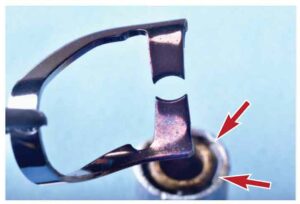
Step 5. Using orthodontic pliers, modify the positions of the buccal and lingual beaks until they are parallel (Figure 14 and Figure 15).
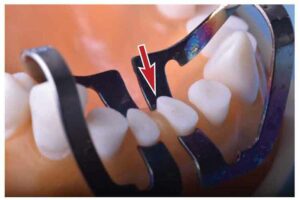
factory-given angulation of the lingual beak.
Compare this to the modified 212 clamp on
the left; note how parallel the beaks are.
Step 6. Alter the width of the buccal beak using a 245 carbide bur. This modification is tooth dependent (Figures 16A and 16B).
Step 7. Alter the shape of the lingual beak using a 245 carbide bur following the angle of the connector between the bow and buccal beak (Figures 17A through 17C).

Step 8. Once all alterations are completed, polish the surface using a polishing wheel.
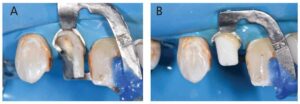
A wider range of clinical applications can now be completed under rubber dam isolation by using a combination of a basic retentive clamp (such as a W3 or W8A) with the new retraction capabilities provided by the modified 212 clamp. Such applications include bonding of indirect posterior restorations (Figure 18), crown preparations (Figure 19), or multiple complex procedures under the same rubber dam — such as caries removal, post cementation, core buildup and final preparation (Figures 20A and 20B). It is important to consider the possible need for either compound or block-out resin to stabilize the clamps, as well as polytetrafluoroethylene tape to push the rubber dam away from the operative field and avoid damaging the dam.
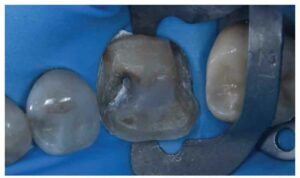
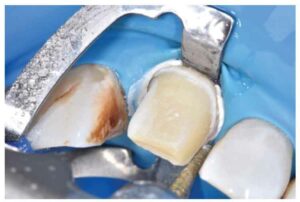
under complete isolation. Note the polytetra – fluoroethylene tape used to separate the
rubber dam from the operative field.
CONCLUSION
Rubber dam isolation has been a valid clinical aid for more than 150 years. The benefits of dam use have been reported in numerous studies, but the clinical reality is they are not widely used in restorative practice. In today’s pandemic environment, changes in clinical protocols are necessary and, based on the ADA recommendations, the demand for complete isolation is likely to grow. Understanding that in some complex clinical situations the use of a basic rubber dam technique may not succeed, it is beneficial to include the W00, B4 and modified 212 clamps in the armamentarium. By incorporating these into clinical workflows, restorative dentists will be able to increase the number of procedures performed following these new guidelines.
KEY TAKEAWAYS
- The use of rubber dam isolation may help decrease possible exposure to infectious agents.
- In light of concerns over COVID-19, there are a number of complex restorative procedures that require more advanced rubber dam isolation techniques.
- This article describes the armamentarium, as well as clamp modification techniques, needed to widen the scope of rubber dam isolation in restorative practice.
- The W00 clamp was designed for use on premolars but, due to its narrow beaks, sharp points and tall bow, it can be used in canines and incisors as well.
- Compared to the W00, the B4 clamp has narrower beaks and rounded points that allow the possibility of pushing the clamp cervically to retract the rubber dam and tissue in subgingival lesions, or for teeth that present with tissue recession and cavitated root surface lesions.
- Due to the fact modifying the 212 clamp will increase its versatility, this article covers the modification steps in detail.
- A wider range of clinical applications can now be completed under rubber dam isolation by using a combination of a basic retentive clamp (such as a W3 or W8A) with the new retraction capabilities provided by the modified 212 clamp.
REFERENCES
- American Dental Association. CDC Guidance for Dental Settings Echoes ADA Guidance. Available at: https://www.ada.org/en/publications/ada-news/2020-archive/june/cdc-guidance-for-dental-settings-echoes-ada-guidance. Accessed January 13, 2021.
- Romero MF, Coleman JF, Pruett M, Babb CS. 10 steps to rubber dam isolation in restorative therapy. Decisions in Dentistry. 2019;5(10):12–14.
- Baum L, Phillips RW, Lund MR. Isolation of the Working Field, Textbook of Operative Dentistry. 3rd ed. Philadelphia: W.B. Saunders Company; 1995:187–220.
The authors have no commercial conflicts of interest to disclose.
From Decisions in Dentistry. February 2021;7(2):22–24.


